


In this WP Rocket tutorial, I will show you step by step how to set up WP rocket, the best WordPress caching plugin for speed optimization.
First, let me explain why it is important to speed up your website.
- A slow website gives a bad user experience and can thereby lower the conversion rate of your website.
- Also, a slow website reflects poorly on the brand as a whole.
- And third, the slower the website, the lower the ranking in the search engines. So a fast website is actually a big improvement for your search engine optimization.
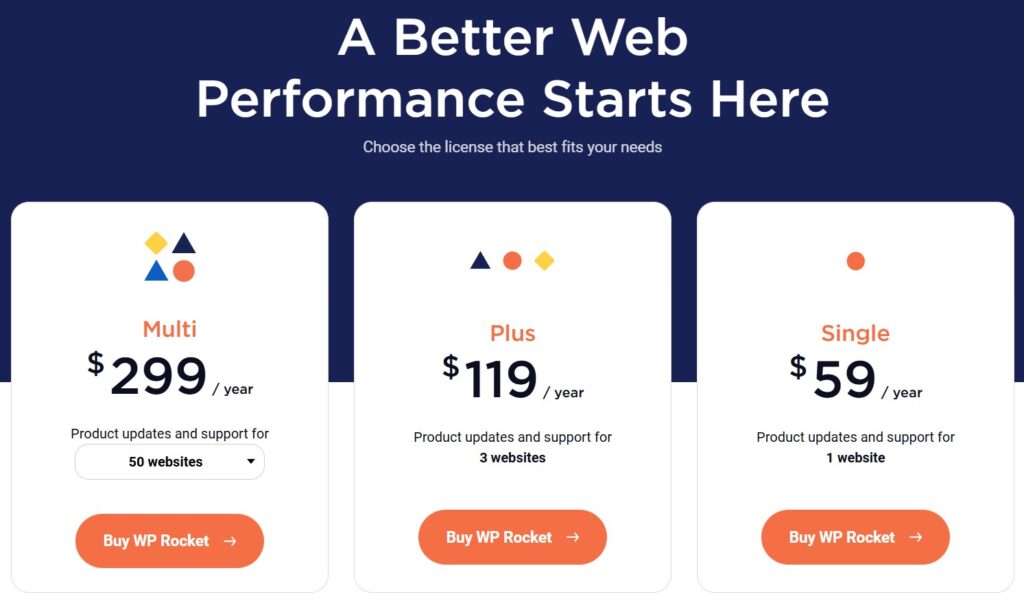
Let’s begin by purchasing the plugin, you can choose a plan for a single site, 3 sites or multiple websites. You might be happy to know that WP Rocket is a French company, and therefore abides by the more strict GDPR privacy law compared to, for example, US law.
Next we will install the plugin, so go to:
- Plugins ➝ Add new ➝ Upload plugin
Tip: Now that we’re looking at plugins, be mindful that if you want a really fast WordPress website, then make sure you don’t have too many plugins installed. Also make sure to update all your plugins regularly, since some of the newer versions will be faster as well.
Initial speed test
Now we’re ready to test our initial website speed. I recommend using these two services:
Choose a testing location as close to your own country as possible. Your results pages should look something like this:
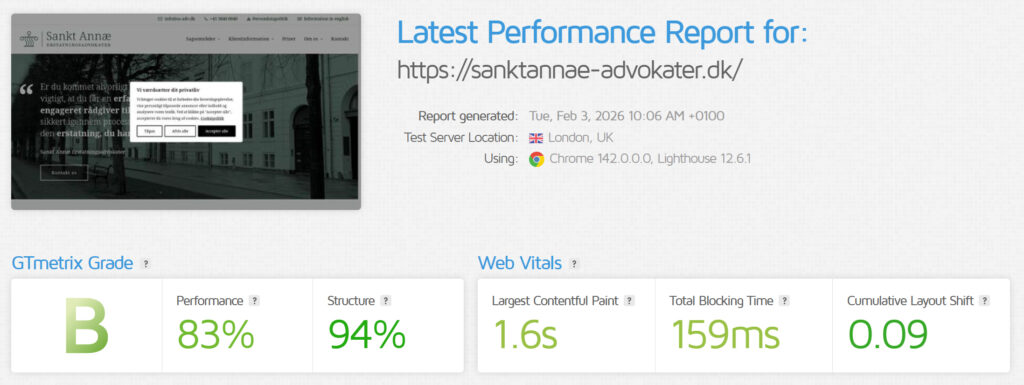
You will both be given a letter grade and a number. Also pay attention to the “First contentful paint” since this is a good indicator of your website speed. We will use this as a comparison after the speed optimization.
WP Rocket speed optimization
Before we begin optimizing I just want to focus your attention to the clear cache link. From now on, the WP rocket cache will be storing your WordPress sites, pages, styles, scripts, and other files in a temporary location so they can be accessed faster.
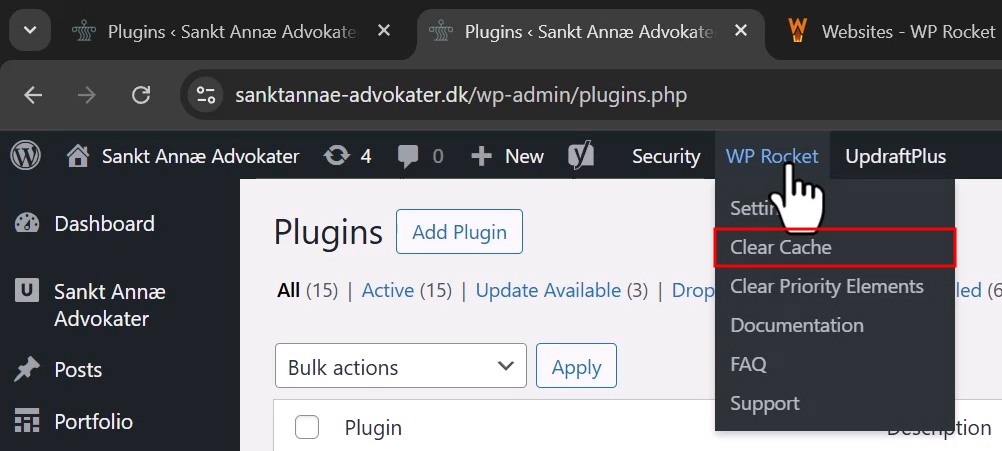
Clicking on “Clear cache” simply means deleting those files to be updated with newer versions.
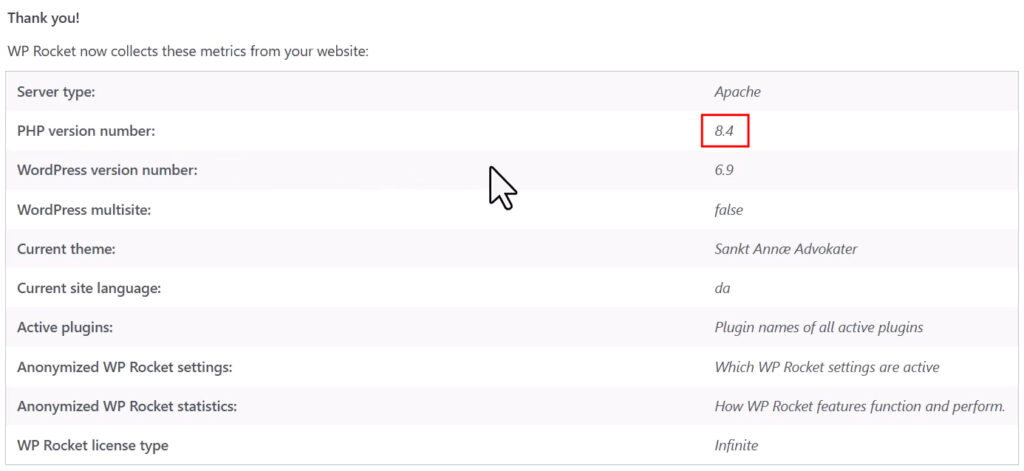
PHP version
And now we get a overview of our WordPress website. And here it’s important to note that your PHP version is as high as possible. So as of this time when I’m creating this tutorial, 8.4 is the most stable PHP version for WordPress websites.
Updating your PHP version drastically increases the website speed as well. So if you have a lower PHP version number, then I recommend you go ahead and:
- Update your plugins
- Your WordPress theme
- WordPress itself
- and then finally update the PHP version to the latest stable version
File optimization
So let’s go ahead and open file optimization. The first setting we want to enable here is Minify CSS files which simply makes the CSS files leaner and faster. And we are actually going to repeatedly enable one setting at a time and then test. This is a very important procedure since it makes it obvious that if something breaks on the site, then we know which setting to tweak afterwards.
Here is the standard testing process to perform after enabling each setting under “File optimization”:
- Save one setting at a time
- Open an incognito tab to see what has changed
- I recommend clicking “Ctrl + Shift + R” to both reload the page and clear the browser cache
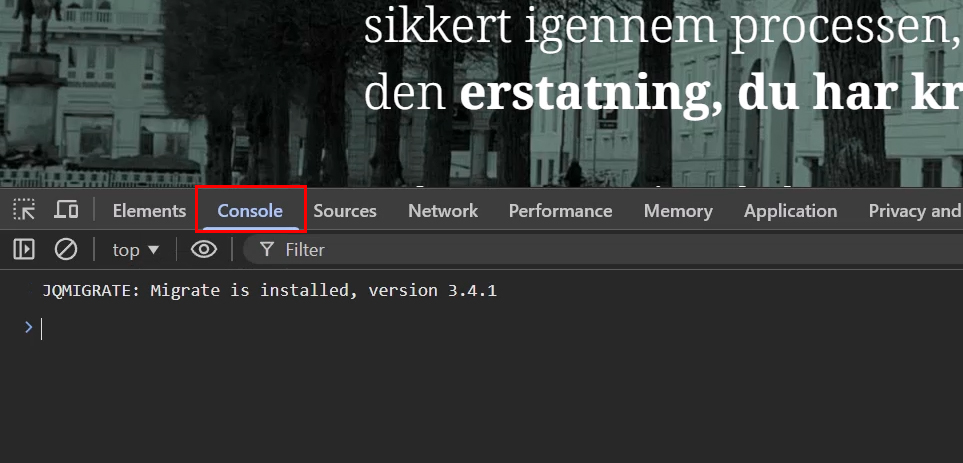
- Then click F12 and view the “Console” tab to see if anything on the website breaks
- Scroll around and click a few pages to see if the layout looks correct as it should
- If everything looks correct, go ahead and enable the next setting and repeat the process
Now I’ll will go back again and enable the next setting, which is Optimize CSS delivery. This also opens up the CSS safe list which we can be used to exclude either CSS files or specific CSS classes.
Next we have JavaScript files. And first we just want to Minify JavaScript files. Remember to keep performing the above testing process for each enabled setting.
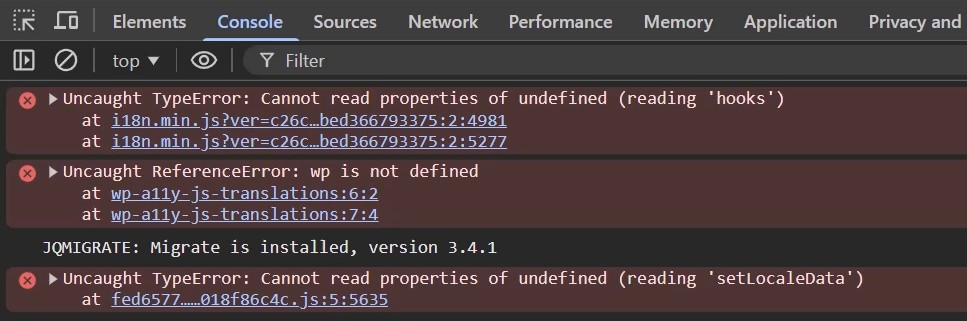
Next up we have Combining JavaScript files. And this is where the site oftentimes can break. So we’ll keep close attention to what’s going to happen when we save the changes. And of course we can go ahead and exclude either “Inline JavaScript” or “JavaScript files” if necessary.
Troubleshooting JavaScript errors
If you don’t encounter any errors, simply continue to the next chapter. But if an error has occurred in your JavaScript files they can be caused by a few different things:
- A JavaScript files is dependent on another JavaScript files that isn’t working
- A JavaScript file is dependent on inline JavaScript that isn’t working
To find the cause of the issue, we just want to search for the specific JavaScript file that is showing an error. But we won’t do it in the incognito tab. We will have a look at the uncached site in our normal tab. So what I’ll do is click “Ctrl + U” to have a look at the source code. And then I will search for that specific JavaScript file.
If you’re experiencing a more difficult issue, I recommend looking at this article from WP Rocket documentation.
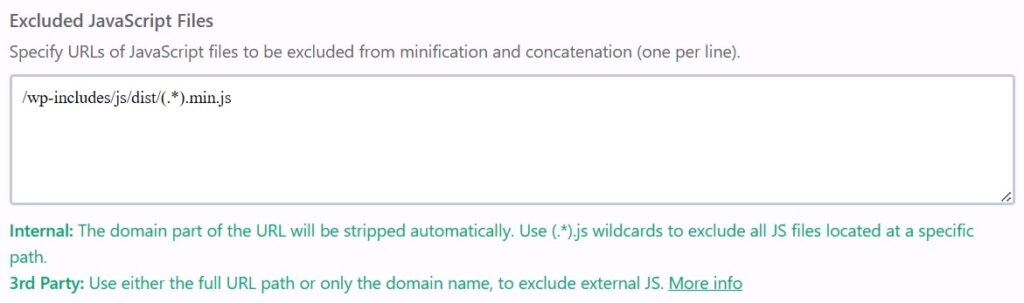
And the easiest solution is oftentimes to exclude the entire folder of files. So what I’ll do is I’ll copy the “link URL” and then paste it into the “Exclude JavaScript files” area. And to exclude all the files we just need to add this code (.*) like such:
/wp-includes/js/dist/(.*).min.jsAnd now every JavaScript file within the “dist” folder will be excluded from combining.
If this doesn’t fix your issue you need to check for “Inline JavaScript” errors. For help view this article from WP Rocket documentation.
File optimization continued
Next up is Load JavaScript deferred which simply removes any JavaScript files that are blocking the loading of the site initially. So we will activate this. And we also get the option to exclude the JavaScript files, but you oftentimes don’t actually have to do this.
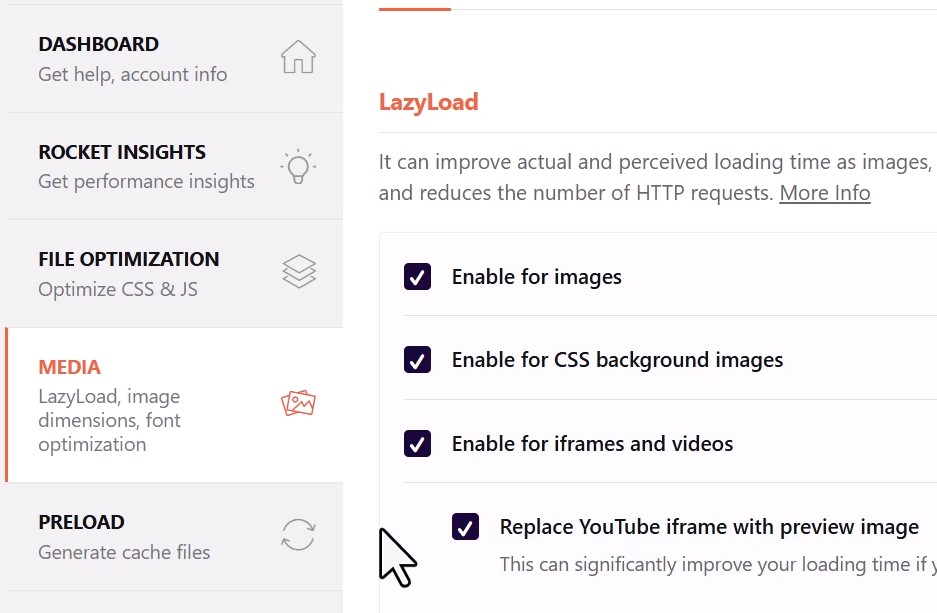
Media settings
Here we have the LazyLoad settings. And I recommend enabling each one of these including “Replace YouTube iframe with preview image”. And we will go ahead and save. If we have any errors we can always exclude specific images or CSS file names for specific images. So we’ll just save and go to the incognito again to check for errors.
Next enable “Add missing image dimensions” which will help prevent layout shifts when loading the site.
Next we can also enable Preload fonts and Self-host Google fonts which among other things prevents the Flash Of Unstyled Text (FOUT) when loading.
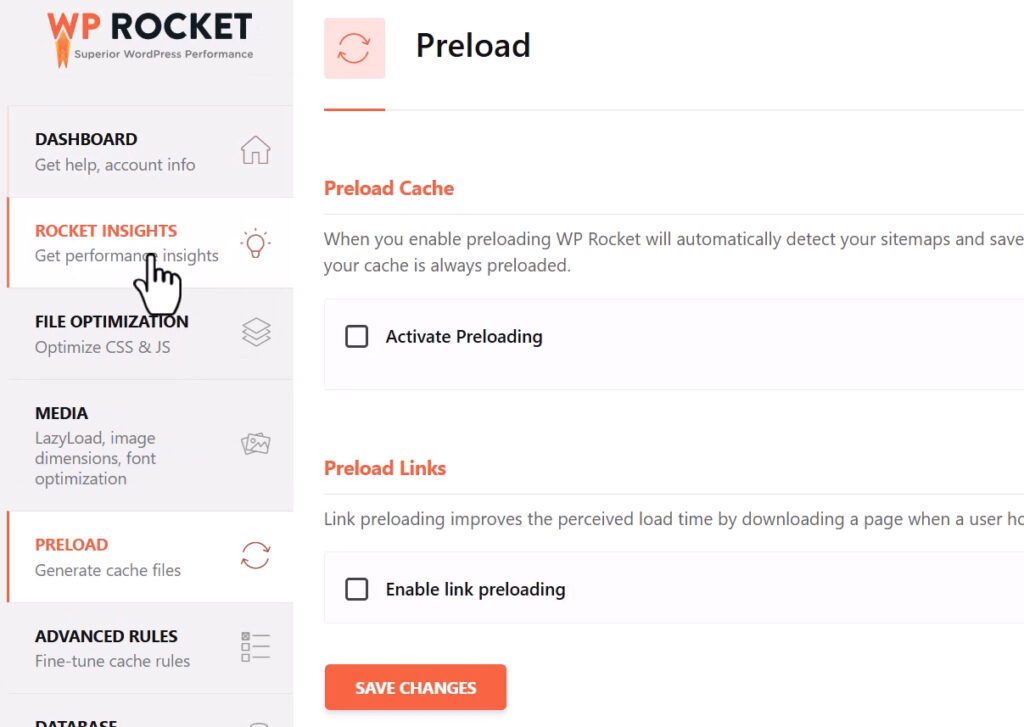
Preload settings
Preload is a really powerful feature that helps the plugin optimize every single page on the site before the visitor actually visits them. So we’ll go ahead and enable Preload. We will also enable Link preloading which begins downloading a page when a user hovers over the link.
Advanced rules
Here we can change the global cache clearing time. Usually ten hours is fine, but if you’re experiencing any issues, then try reducing it to 8 or 6 hours. But as a starting point, ten hours is fine. Next, we can ask it to Never cache URL(s) which simply exclude specific pages from caching.
Next, we have the Never Cache Cookies settings. And if you have WooCommerce installed, then I recommend adding these to cookies, which will help the cart function properly:
woocommerce_items_in_cart
woocommerce_recently_viewed
View an updated list of cookies to exclude here in the WooCommerce documentation.
Next we have Always Purge URL(s) which is useful if you have a custom page to show your posts and articles. In that case you should add the page’s URL here. So any time you update any post a page then that page will also have its cache cleared.
Database settings
Next up we have some database optimization settings like Post Cleanup and Comments Cleanup. I usually don’t touch these, but it is possible to clean up your database. You can also remove all revisions, but I love revisions. I love being able to go back and find previous versions of pages and articles. So I always just leave these settings.
CDN settings
Next we have CDN integration. CDN is short for Content Delivery Network and it’s a must have if you have an international website. But if you only rely on local visitors and your server is located in your own country, then it’s not necessary to invest in this functionality. You can enable Rocket CDN, which is a product of WP Rocket, or you can enable your own CDN as well.
If you wish to enable Cloudflare CDN, then you find those settings under Add-ons.
Image optimization with IMAGIFY
Image optimization is super important for speeding up your website, since images account for most of the loading time of any website. IMAGIFY is also a product of WP Rocket and it’s a plugin I use on every single website I set up. You get the latest image optimization technology called WebP, which is incredibly good at optimizing the images without losing the image quality. So I recommend installing IMAGIFY right away.
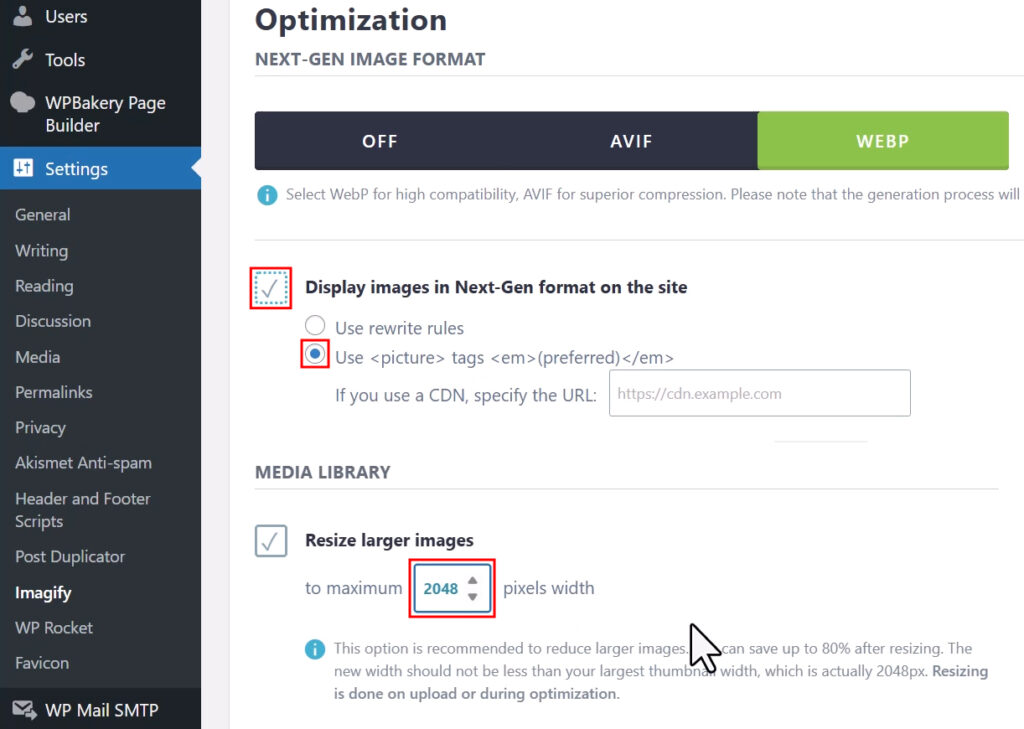
After installing go to Settings. And I always recommend clicking “Lossless compression” which makes sure that you don’t get any pixelated images. Next we just need to enable the WebP images. And we want to use the <picture> tag which is also the preferred method. Next, we can tweak the resize settings. The lowest we can go is 2048px which should be sufficient for any website in my opinion.
Next we can go ahead and save and go to the Bulk optimizer and start the optimization.
Fixing too large images with IMAGIFY
Sometimes the WebP image optimization can make an image appear too large. In that case we just need to add a little bit of custom CSS to make it resized properly. To add custom CSS go to:
- Appearance ➝ Customize
Or any other place to add custom CSS. And the code I want to add is:
.class picture {
    width: auto;
    height: 100%;
    background-size: 100% 100%;
}
Make sure to replace the Class name with the correct class that targets your image.
Final speed test
Now it’s time to speed test your website one last time. Make sure to clear your cache on final time.
Your website should now load much faster. I hope that you have success optimizing your own website.
Disclaimer: You can help support content creation. If you click some of my links, WP Explainer may get a compensation. I only partner with companies and products that I’d happily recommend to my audience.

Related tutorials
UptimeRobot review: Best website uptime monitoring tool
UptimeRobot is a great tool for website uptime monitoring and a must-have for any serious website developer, IT professional, online marketeer, server manager or business owner
Mailgun tutorial for beginners
Learn to setup the reliable email delivery service Mailgun with two techniques: API key and SMTP
Free WordPress Cookie Plugin – CookieYes Tutorial
In this tutorial you will learn to install and setup the FREE WordPress cookie plugin: CookieYes
Webtoffee GDPR Cookie Consent tutorial
In this tutorial you will learn to install and setup the best cookie consent plugin for WordPress: Webtoffee Cookie Consent

Polylang tutorial – Time efficient setup
In this tutorial you will learn how to quickly setup a multilanguage website using the free Polylang plugin.
The 4 step checklist for changing your WordPress website
Using these 4 steps to make changes to your WordPress website, will save valuable time.