


I recommend this plugin because it’s cheap compared to the alternatives, it’s easy to setup, it has an intuitive design and it comes with all the functionality needed to comply with the privacy laws in any country in the world.
Price comparison for other plugins with a yearly plan:
| WordPress cookie plugin | Price in $ |
|---|---|
| CookieYes (Free) | $0 |
| Complianz | $59 |
| Webtoffee | $69 |
| Cookiebot | $96 |
| Termly | $120 |
| CookieYes (Paid) | $250 (With popup) |
Yes free alternatives exists but like CookieYes, they are limited in either page views or functionality, and for that reason I recommend Webtoffee.
Step 1: Installation
You can choose a plan for a single site or if you have a couple of friends you can share a plan for more sites and save money. Don’t worry there’s a 30 day money back guarantee if you’re not satisfied.
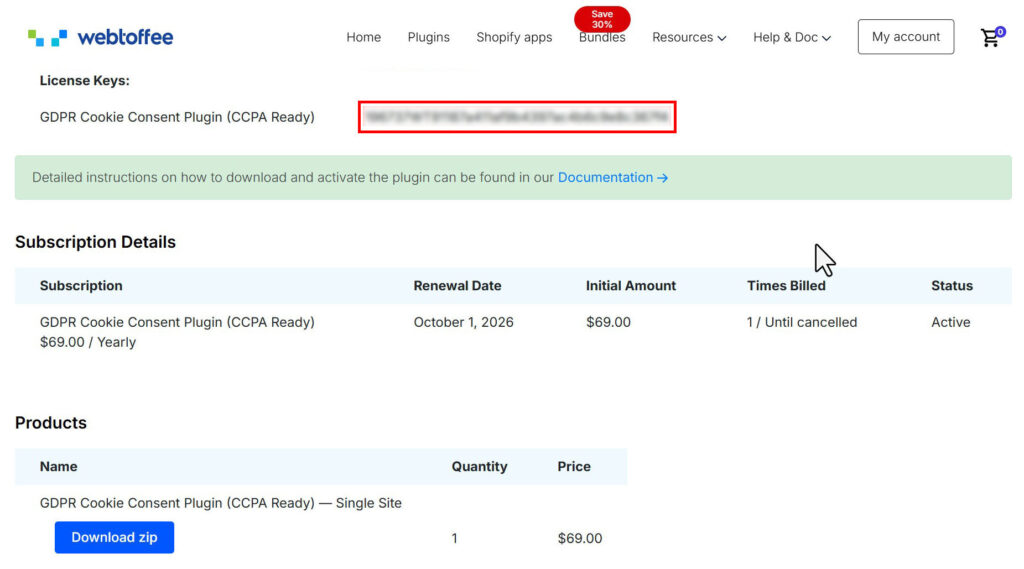
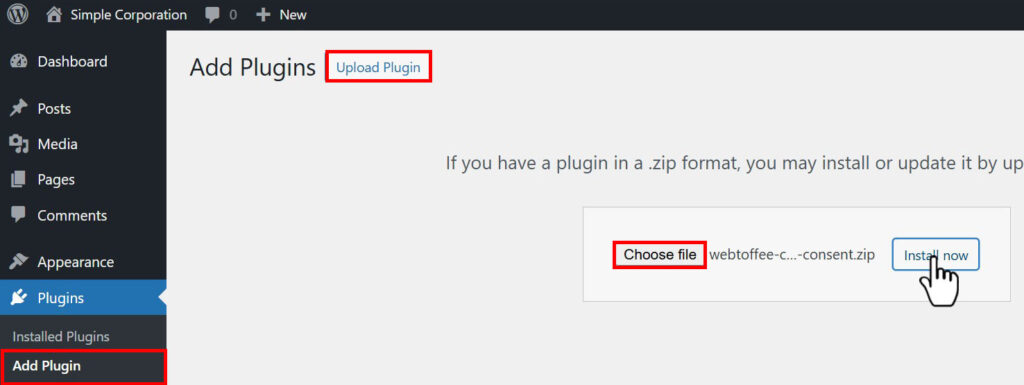
After purchasing the plugin simply click on “Download zip” and then install the plugin on your WordPress website. Also, save your License Key which you will need later for activation.
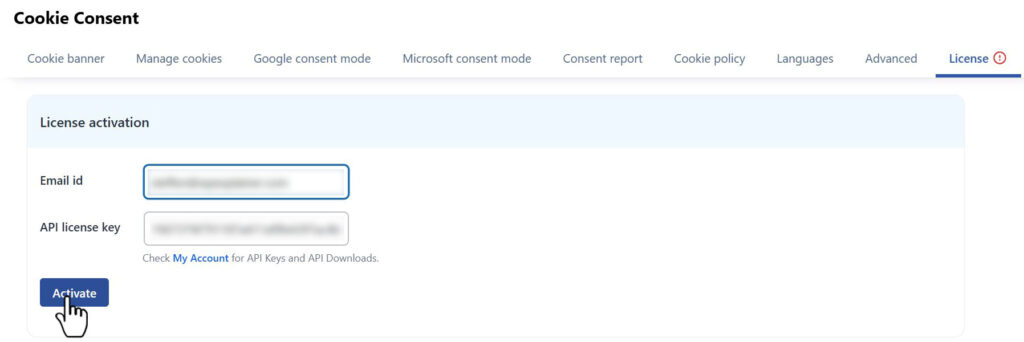
After installation and activation go to the Licence tab and insert your Licence Key and email address.
Step 2: Settings
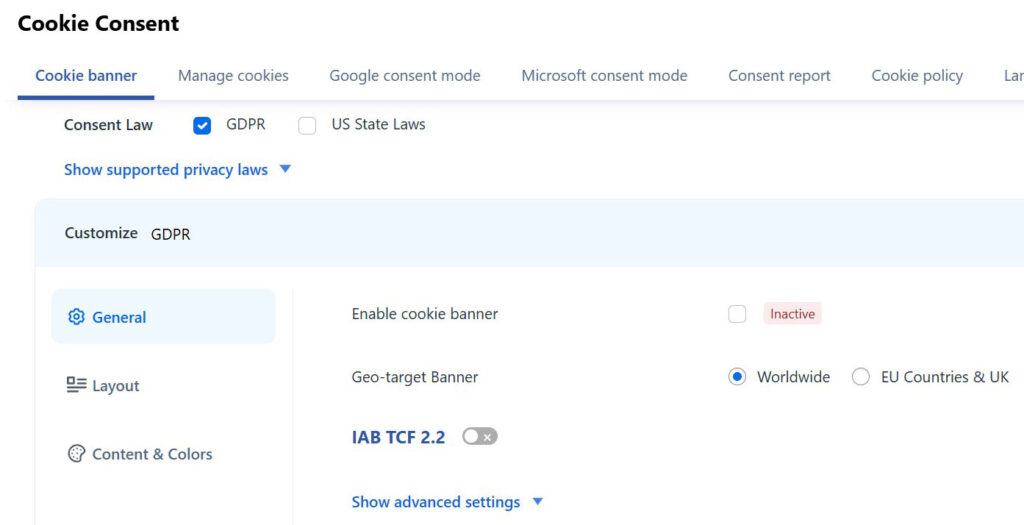
Start by disabling the cookie banner, since we need to get it properly setup first. Then choose your consent law, GDPR for Europe or US State Laws. I recommend targeting all visitors Worldwide since it gives a good impression of your site and because geo-targeting can cause a delay when loading your website.
Turn on IAB TFC 2.2 only if you’ve chosen GDPR and expect to do ads or remarketing.
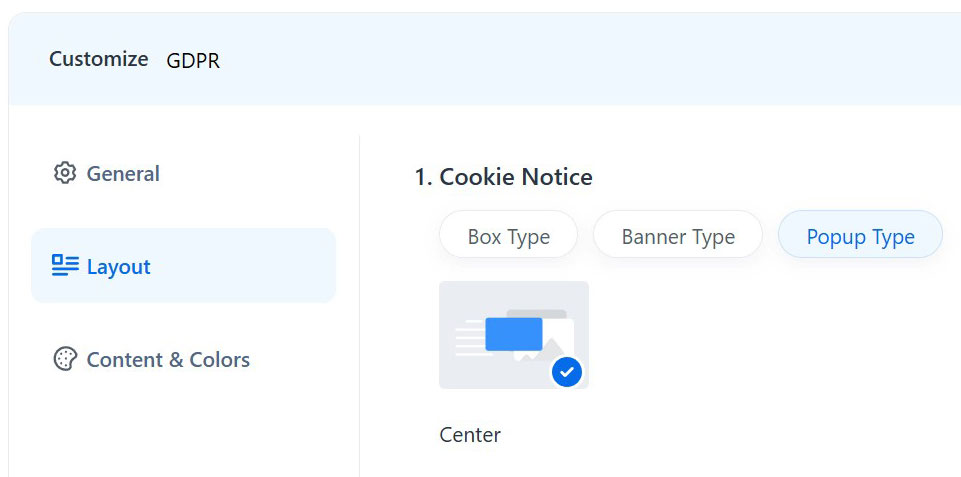
Layout
Under Layout I recommend picking Popup Type since it forces the visitor to make a choice regarding cookies before browsing your website. In this way, if they accept cookies, you’ll get tracking data for their entire visit on your site.
Step 3: Content & Colors
Go through each subject and optionally adjust the text. If the language doesn’t fit your websites language, then we can easily change it under the “Languages” tab. Here you can also add more languages if you have a multilingual site. Under “Cookie Policy link”, insert the link to your cookie page. If you don’t have one, then you can create one automatically under the “Cookie Policy” tab.
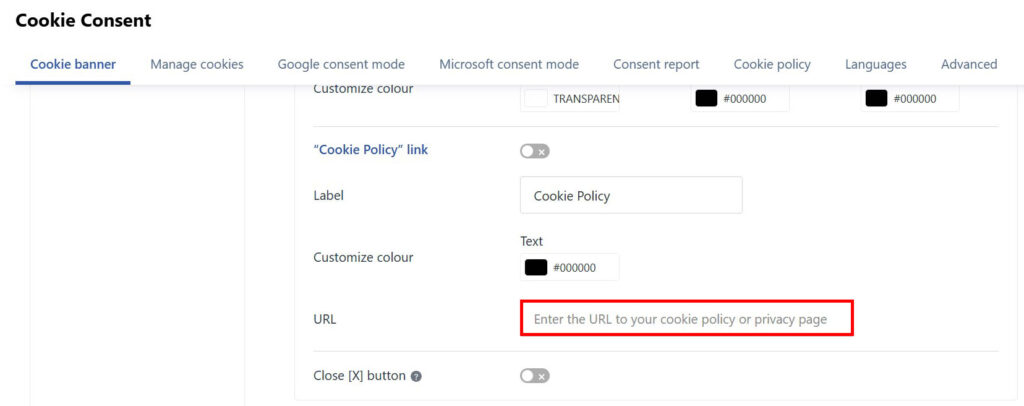
If you’re in Italy, then you’re required to enable the X button, otherwise I recommend keeping it disabled.
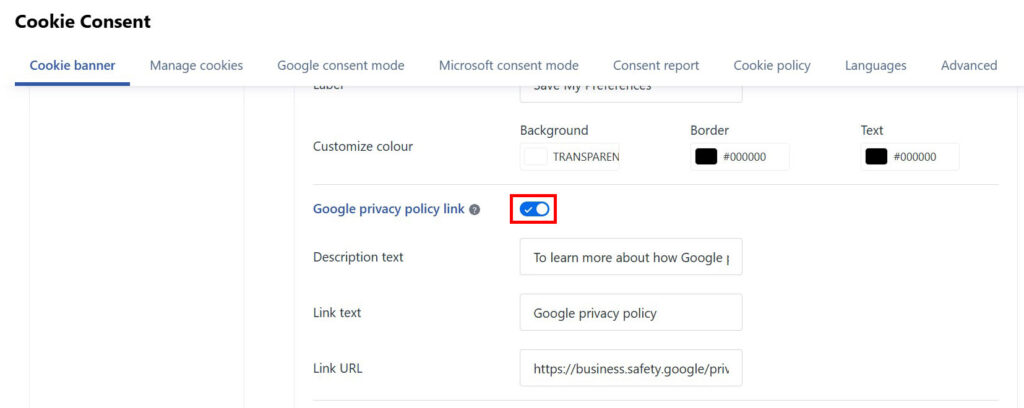
Also if you’re in Europe and using any Google service like Google Analytics, then GDPR requires you to enable the Google privacy policy link.
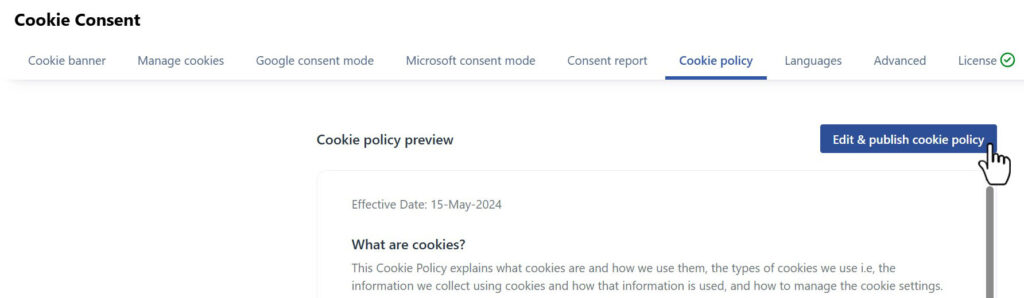
Optional: Cookie Policy
If you haven’t already created a Cookie Policy page now is the time. Simply click the blue button and publish the page. Now add a link to the page in the footer of your website. The page includes a button to revisit the consent which is required by GDPR.
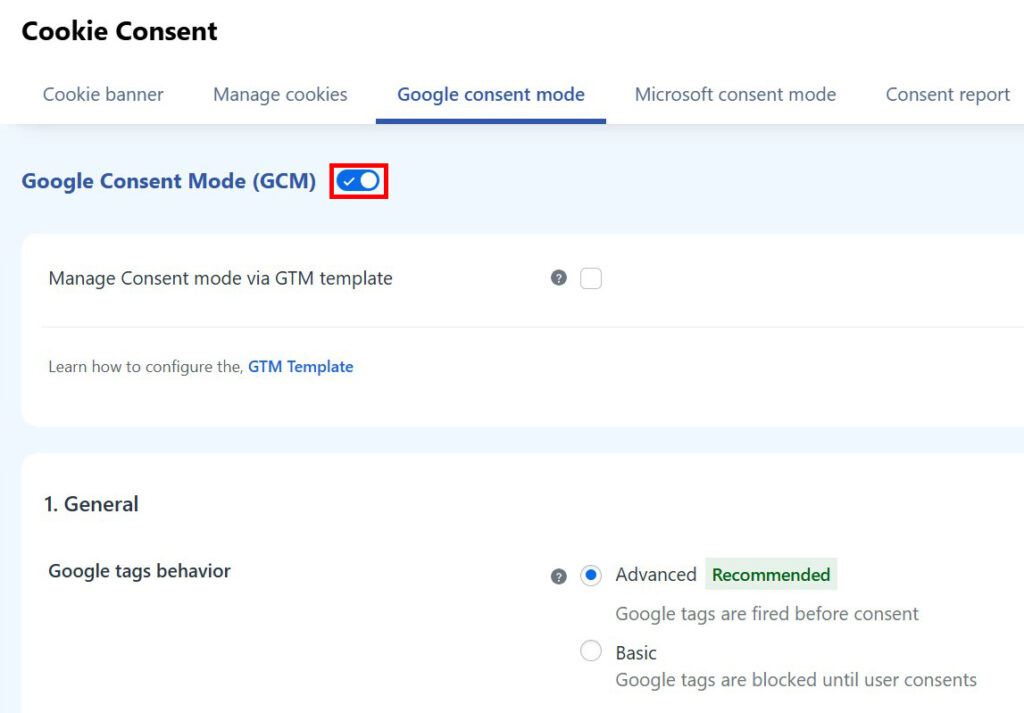
Optional: Google consent mode
If you’re using Google Ads and/or remarketing then it’s mandatory to enable Google Consent Mode, since Google might otherwise block the ads completely without the proper consent.
Step 4: Cookie scanning
Before starting the cookie scanner I recommend:
- Make sure any “Maintenance mode” or “Hide my site” plugins are deactivated, otherwise the scanner won’t be able to register any cookies.
- Make sure your Analytics tracking code is installed and working.
- If you expect to embed Youtube or Vimeo videos on your website, make sure to add at least one video from each channel before scanning. Add the video to a published post or page – private posts won’t work
- Don’t do any updates on the site while scanning
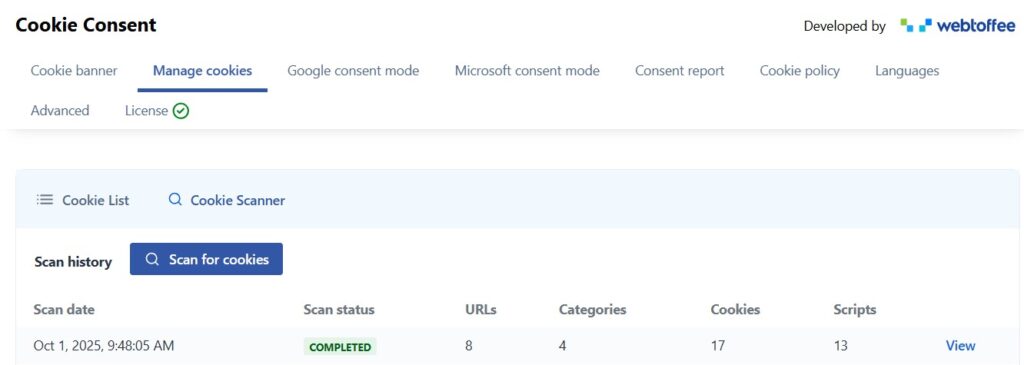
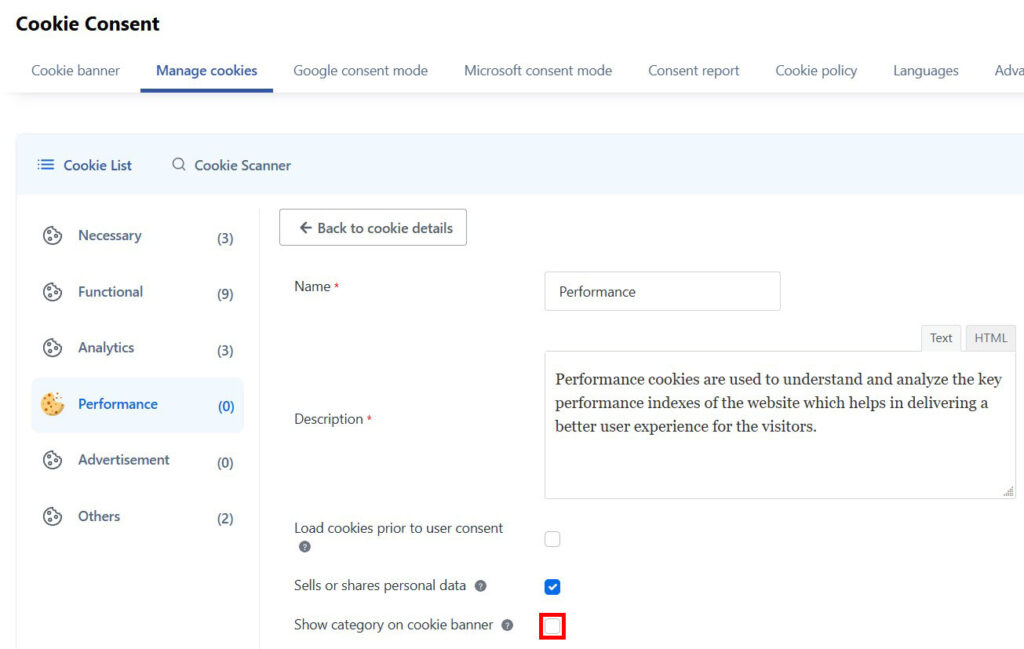
Step 5: Cookie categories
After the scan is complete it’s time to assess your cookies and make sure they’re properly organized. Be mindful that Analytics tracking cookies can’t be categorized as essential cookies, since they require explicit consent.

Remove any unused categories by clicking the pencil and disabling “Show category on cookie banner”.
Optional: Caching issues
Also, if you’re using a caching plugin I recommend excluding this folder, since it otherwise could cause issues:
/wp-content/plugins/webtoffee-cookie-consent/lite/frontend/js/(.*).min.jsThe asterix meaning all JavaScript files within this folder.
Step 6: Activate
Last but not least, click Activate under “Enable cookie banner” to finalize the setup.
Let me know in the comments if you found this tutorial helpful or if you’re missing any relevant information.
Disclaimer: You can help support content creation. If you click some of my links, WP Explainer may get a compensation. I only partner with companies and products that I’d happily recommend to my audience.

Related tutorials

WP Rocket tutorial – WordPress cache plugin for speed optimization
In this tutorial you will learn to setup WP Rocket the best WordPress caching plugin for speed optimization

UptimeRobot review: Best website uptime monitoring tool
UptimeRobot is a great tool for website uptime monitoring and a must-have for any serious website developer, IT professional, online marketeer, server manager or business owner
Mailgun tutorial for beginners
Learn to setup the reliable email delivery service Mailgun with two techniques: API key and SMTP
Free WordPress Cookie Plugin – CookieYes Tutorial
In this tutorial you will learn to install and setup the FREE WordPress cookie plugin: CookieYes

Polylang tutorial – Time efficient setup
In this tutorial you will learn how to quickly setup a multilanguage website using the free Polylang plugin.

The 4 step checklist for changing your WordPress website
Using these 4 steps to make changes to your WordPress website, will save valuable time.