This tutorial covers the following subjects:
- Creating and adding your API key
- Creating your fields including firstname and lastname
- Adding Groups checkbox fields
- Adding a GDPR checkbox
- Adding CSS Classes to layout our form
- Adding a tag to the specific form
- Changing the confirmation message
Here’s the GDPR checkbox code snippet:
I have read and accept the <a href="#" target=”_blank”>Privacy Policy</a>
Read the tutorial in text format
The Mailchimp addon is a basic addon for Gravity Forms which means that you get it with any of their licence plans.
Installation and setup is fast and easy:
- Go to the Add-Ons tab in your WordPress dashboard
- Find the Mailchimp Add-On and Install
- Now find your API Key in your Mailchimp account under: Account → Extras → API Keys (Create a key if you don’t have one)
- Copy the API key and add it to the Settings found under the specific Mailchimp settings
- And now you’re ready for the next step which is creating your form
Create a signup form
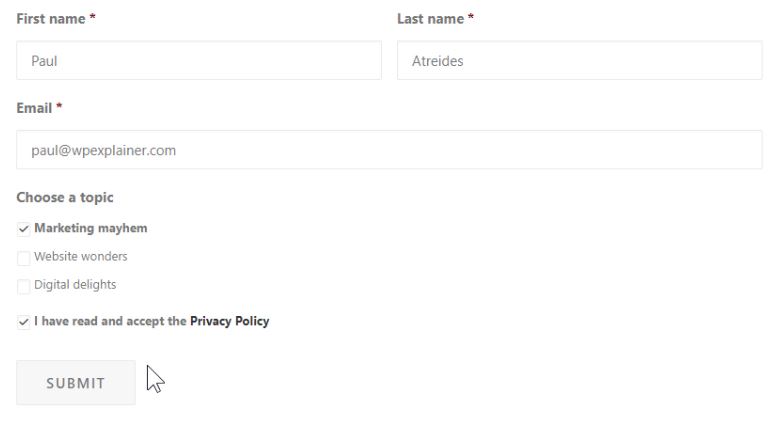
I strongly recommend adding the first and lastname to your form because it helps you to avoid the spamfilter. For more information I’ve made a thorough video on Youtube about How to avoid spam filter in Mailchimp.
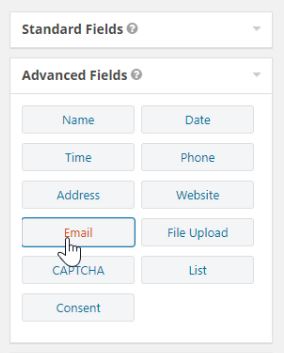
It’s important to use the specific email input field, which is found under “Advanced fields”.
Otherwise you cannot create the next step which is setting up your Mailchimp Feed.
But, before we setup our feed, just a quick note. If you’re in the EU or another country with strict privacy laws it’s can be a good idea to add a privacy consent box as well.
This is just a simple checkbox which says something like this:
I have read and accept the <a href="#" target=”_blank”>Privacy Policy</a>
Remember to replace the hashtag with a link to your privacy policy page.
The link is set to open in a new window so it doesn’t lead people away from the actual signup form if they click it. Since the text is self-explanatory we can go to appearance and change the field label visibility to hidden.
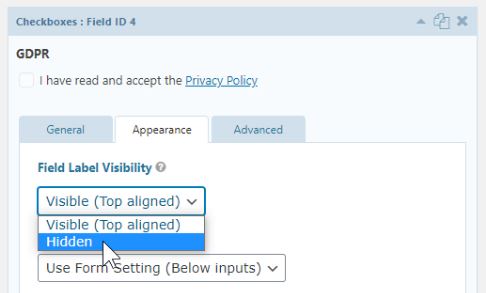
Remember to make this box required as well.
Let’s also add our Groups with a checkbox. I will simply insert the same options as I’ve already created them in my Mailchimp account.
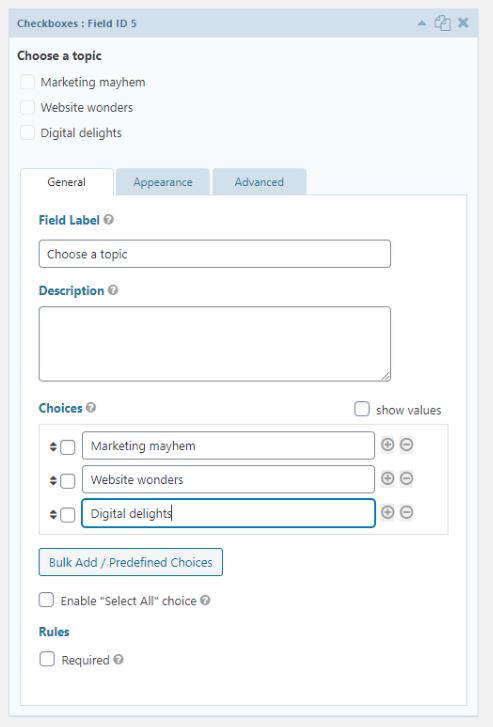
This field CAN be made required to FORCE a selection or just leave it as it is, whichever you prefer.
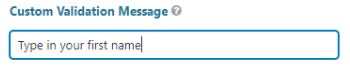
As an extra icing on the cake you can also add custom error messages to each input field, just to help anyone having trouble filling out your form.
Also if you want to align the first and lastname side-by-side you can add the css classes gf_left_half and gf_right_half.
Watch a more thorough tutorial about Gravity Forms CSS classes on my Youtube channel.
Create a mailchimp feed
Okay now we’re ready to link our form to Mailchimp with our feed.
- Start by choosing your list
- Then select the corresponding field to your form
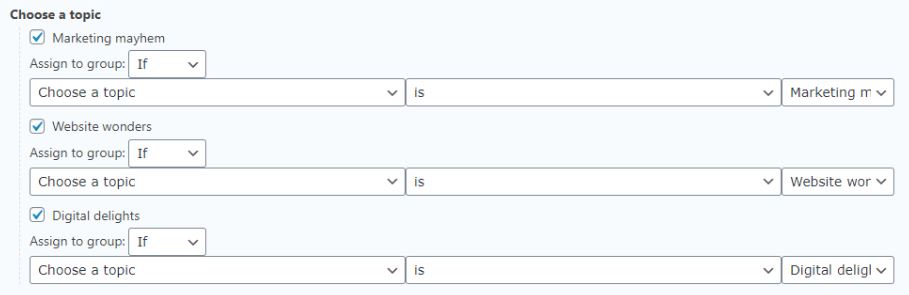
- If you’ve created Groups in Mailchimp you can now assign your fields to the right selections. Choose “If” and select the corresponding fields.
- Marketing permissions will be visible if you have GDPR fields activated.
- Next you can check double-optin or leave it unchecked for single-optin.
- You can also tag the subscribers coming from this specific form.
Tagging you subscribers is a smart way to keep track of who signs up on which forms on your website. If you fx a running a campaign on a landing page, you can put in the tag “Freebie campaign 2021” and then send specific newsletters to these subscribers.

Now we’ve setup our feed so it’s time to save it. I always recommend giving your forms a test so I suggest making a draft or private page on your website, to test your new newsletter signup form.
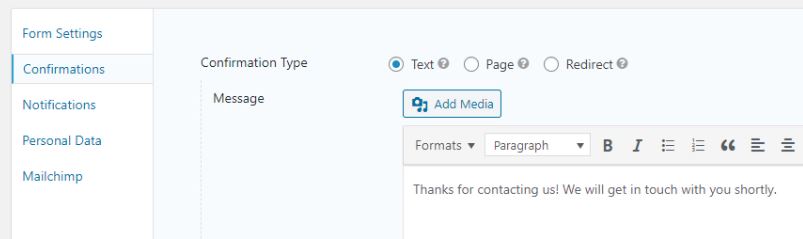
Lastly, to change the confirmation message, simply go to:
Settings → Confirmations
And update the text.
For more information take a look at the Mailchimp documentation here:
https://docs.gravityforms.com/adding-mailchimp-subscriptions-to-groups/
Disclaimer: You can help support content creation. If you click some of my links, WP Explainer may get a compensation. I only partner with companies and products that I’d happily recommend to my audience.

Related tutorials

Proton Review: Why and how I switched to Proton – Benefits and frustrations
This review examines the benefits and frustrations of switching to Proton Mail, Pass, VPN and Drive
Free WordPress Cookie Plugin – CookieYes Tutorial
In this tutorial you will learn to install and setup the FREE WordPress cookie plugin: CookieYes
Webtoffee GDPR Cookie Consent tutorial
In this tutorial you will learn to install and setup the best cookie consent plugin for WordPress: Webtoffee Cookie Consent

Mailchimp single vs double optin
Learn the differences between single- and double optin in Mailchimp and a step-by-step guide to easily enable double optin for you account

Huge change to Mailchimp’s free account
Mailchimp's free account is being nerfed this monday the 29th of August
Newsletter template design in Mailchimp – Indepth tutorial
Learn how to design a fully customized Mailchimp newsletter template in this indepth step-by-step tutorial